Access controls
Access groups control who can sign in, which tenants they can see, and what they can do there. Come here to create a group, change its tenants, or manage who is in it.
The access groups table
Section titled “The access groups table”The table lists every group your MSP has, with its role, how many tenants it covers, and how many people are in it.
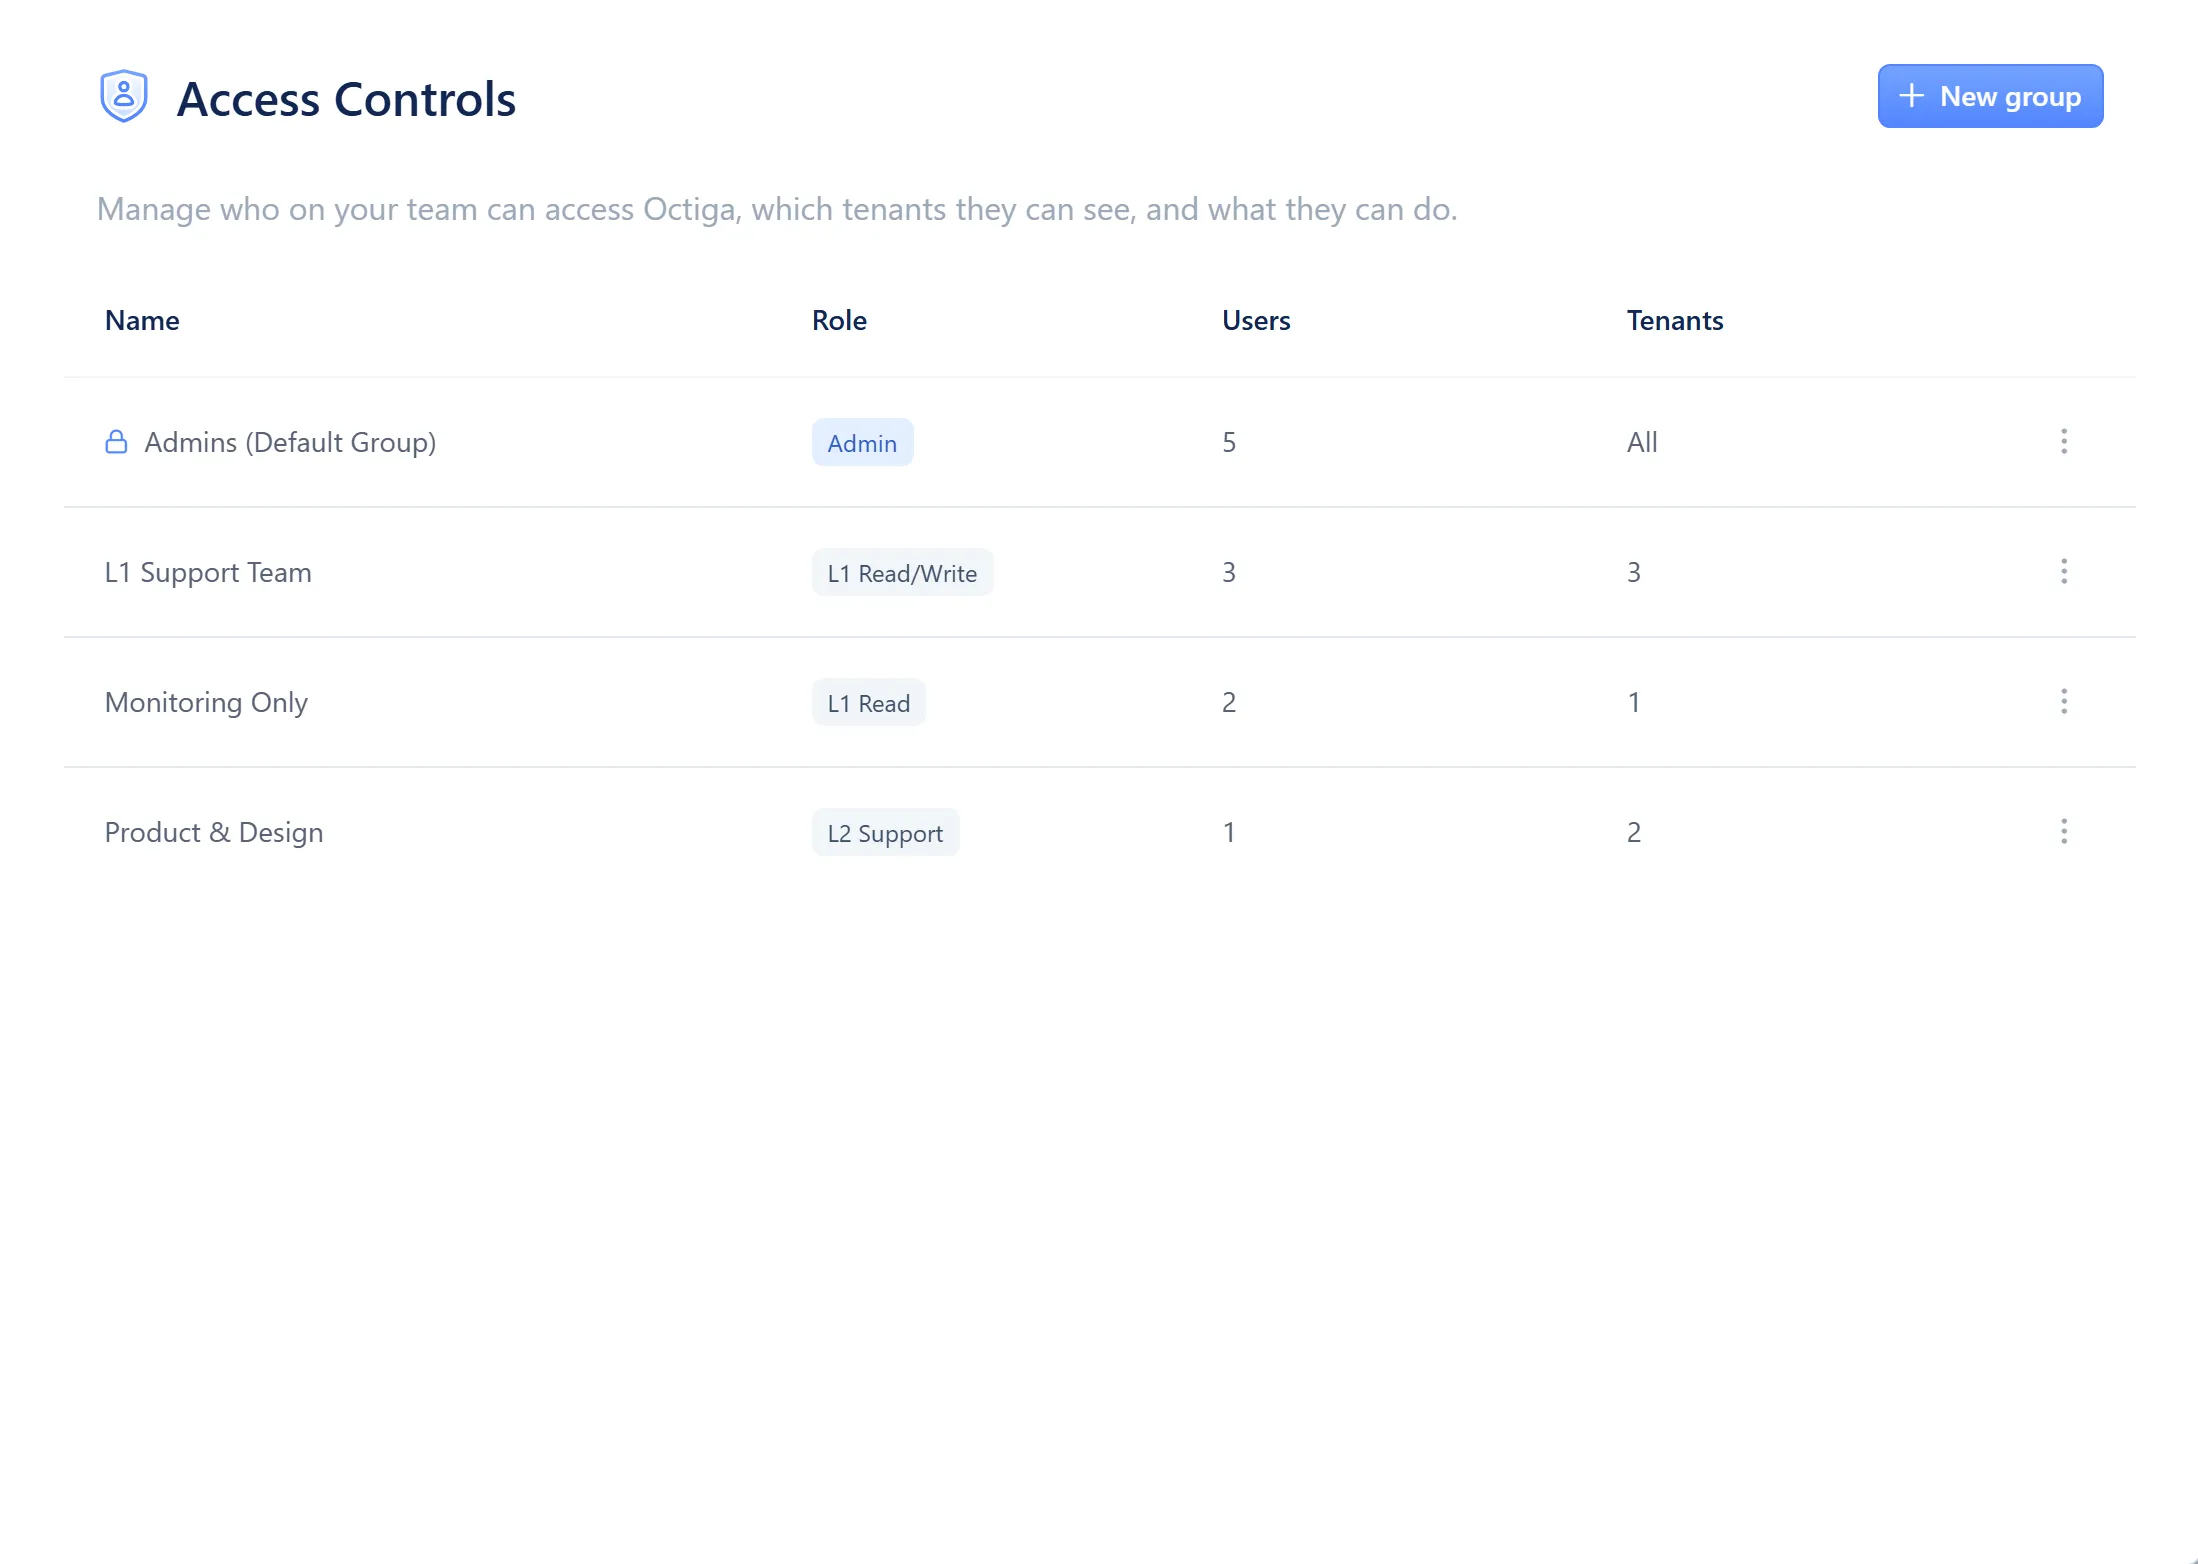
- The locked Admins group — a lock icon before its name
- The row menu — Edit, or Delete for any group except Admins
- Name — the group’s name. The default Admins group carries a lock icon.
- Role — the one role this group grants. See Roles and permissions for what each role can do.
- Users — how many people are in the group; hover for the names.
- Tenants — the tenants this group’s members can reach; “All” for the Admins group.
The Admins group
Section titled “The Admins group”Every MSP has one Admins group. Its name and role are fixed, it always reaches every tenant, and it can’t be deleted. You can still add and remove its members.
The group side sheet
Section titled “The group side sheet”Opening a group, or selecting New group, opens this sheet.
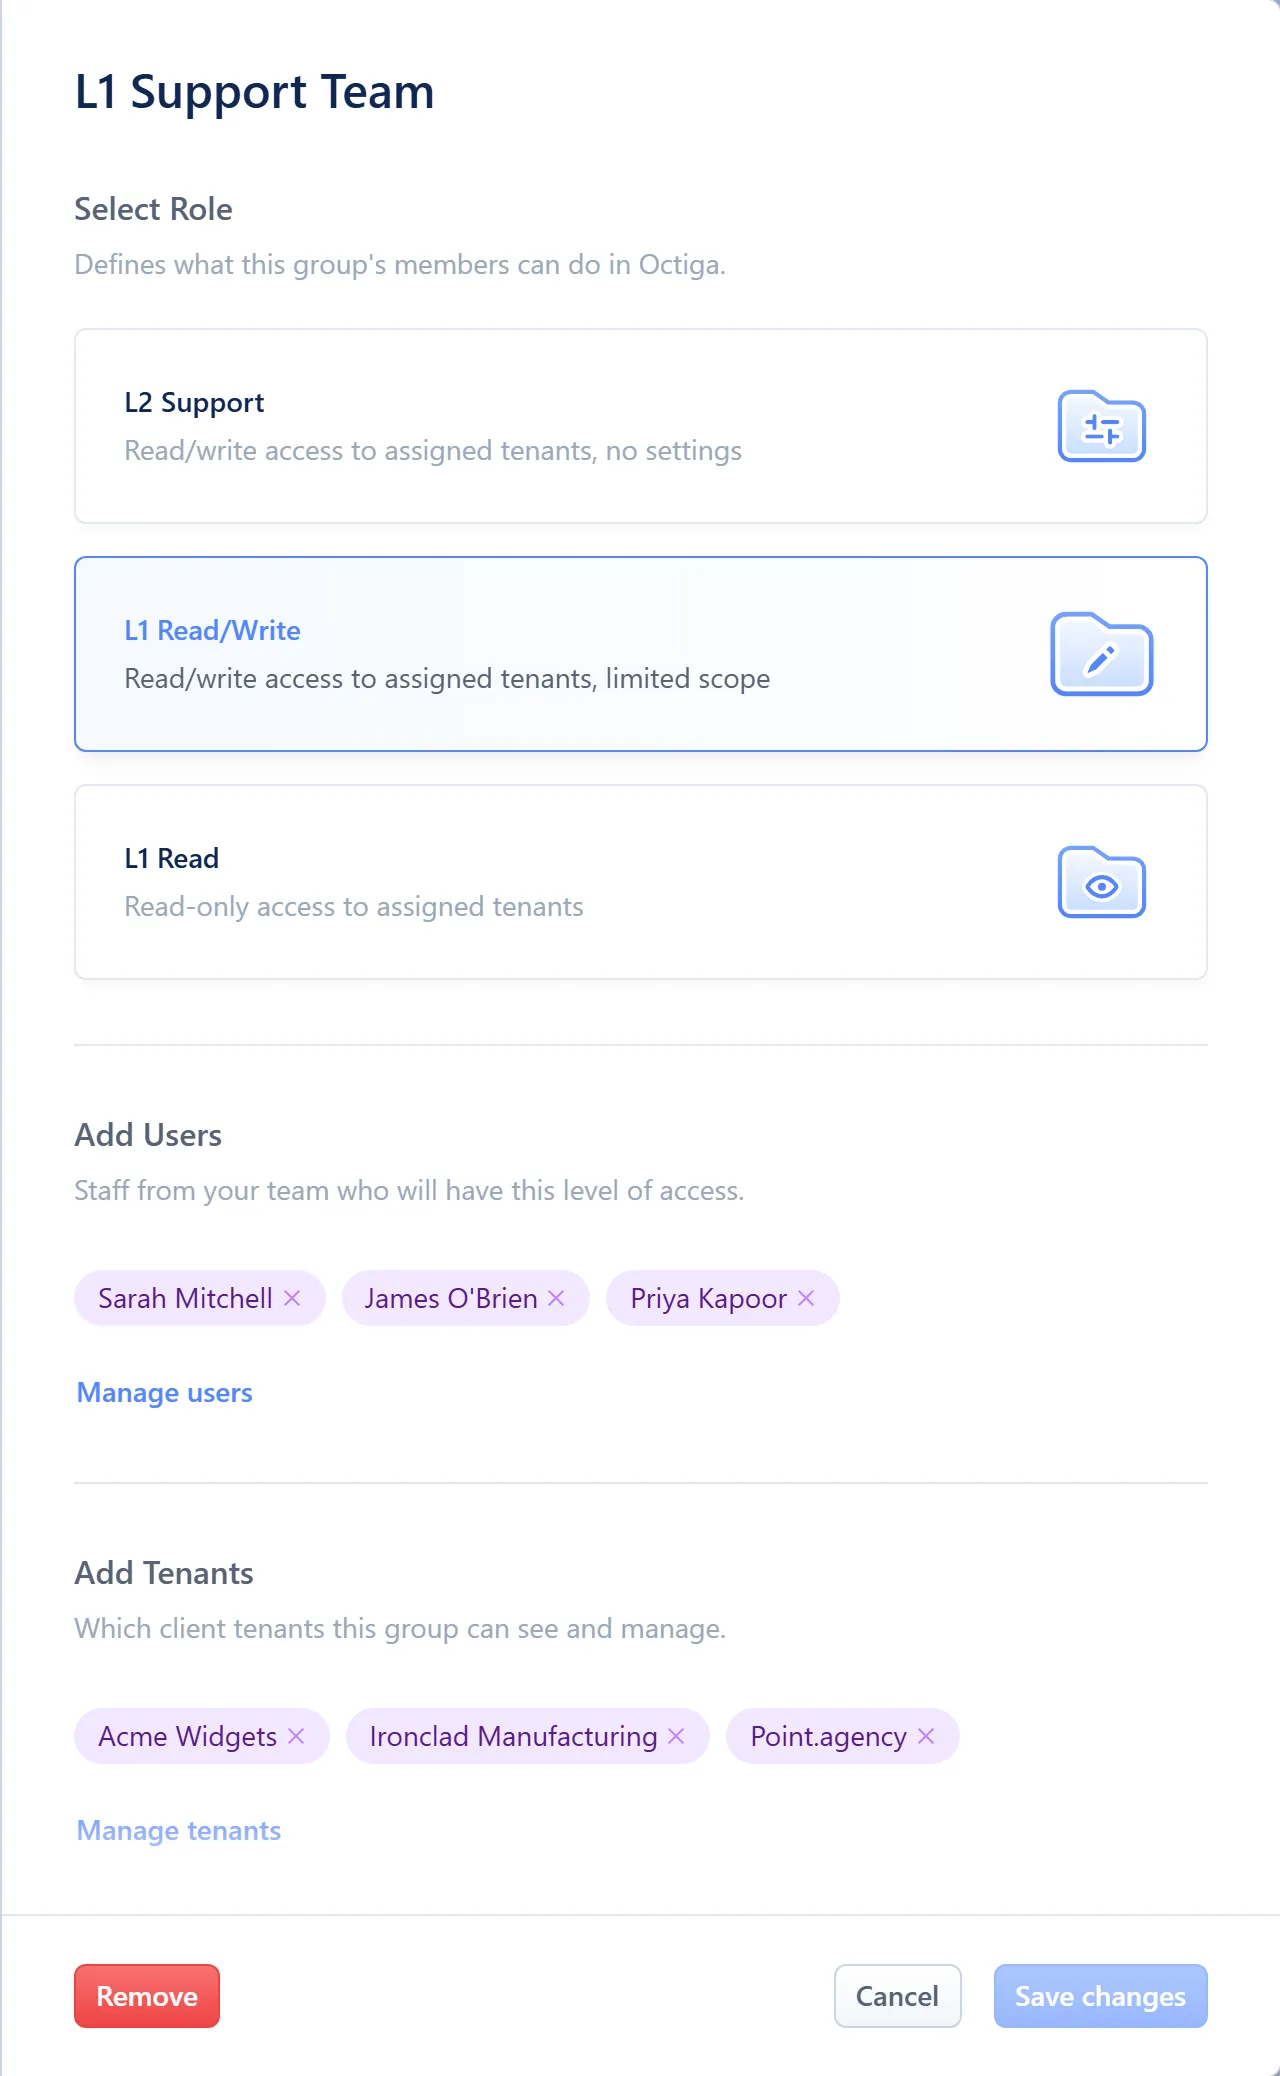
- The role picker — Admin is not offered here; it belongs only to the locked default group
- Members of this group
- Tenants this group covers
- Name — editable in place, at the top of the sheet.
- Role — L2 Support, L1 Read/Write or L1 Read. A new group has no role selected until you choose one.
- Tenants — added or removed from your MSP’s connected tenants.
- Users — added or removed from your MSP’s Microsoft 365 staff directory.
Create a group for a set of tenants
Section titled “Create a group for a set of tenants”-
Open Settings from the gear icon, then choose Access Controls.
-
Select New group.
-
Name the group.
-
Choose a role.
-
Add the tenants this group should reach.
-
Add the people who should be in it, then select Create group.
Add a member to a group
Section titled “Add a member to a group”-
Open Settings from the gear icon, then choose Access Controls.
-
Select the group.
-
Add the person under Users, then select Save changes.
Change a group’s tenants
Section titled “Change a group’s tenants”-
Open Settings from the gear icon, then choose Access Controls.
-
Select the group.
-
Add or remove tenants, then select Save changes.
The Admins group always reaches every tenant, so it has no tenants to change.
Remove a member
Section titled “Remove a member”-
Open Settings from the gear icon, then choose Access Controls.
-
Select the group.
-
Remove the person from Users, then select Save changes.
Related
Section titled “Related”For what each role can see and do, see Roles and permissions.