Reports
A report schedule emails one tenant’s security report on a regular cadence. Come here to see every tenant that has a schedule, add a new one, or change who receives it.
What a report is
Section titled “What a report is”Each schedule sends one tenant’s security report (a summary of its posture and deviations) by email, on the cadence you set. A tenant can have more than one schedule, each with its own recipients.
Run a report on demand
Section titled “Run a report on demand”Coming soon
This part of Octiga isn't built yet. Check back once it ships.
Reading the list
Section titled “Reading the list”Report Schedules is a three-level drill-in. Open it from the gear icon in the top bar, then choose Report Schedules.
Every tenant with a schedule
Section titled “Every tenant with a schedule”The top level lists only tenants that have at least one schedule. Each row shows the tenant, how many of its schedules are enabled and how many are paused, and the soonest next run across all of them.
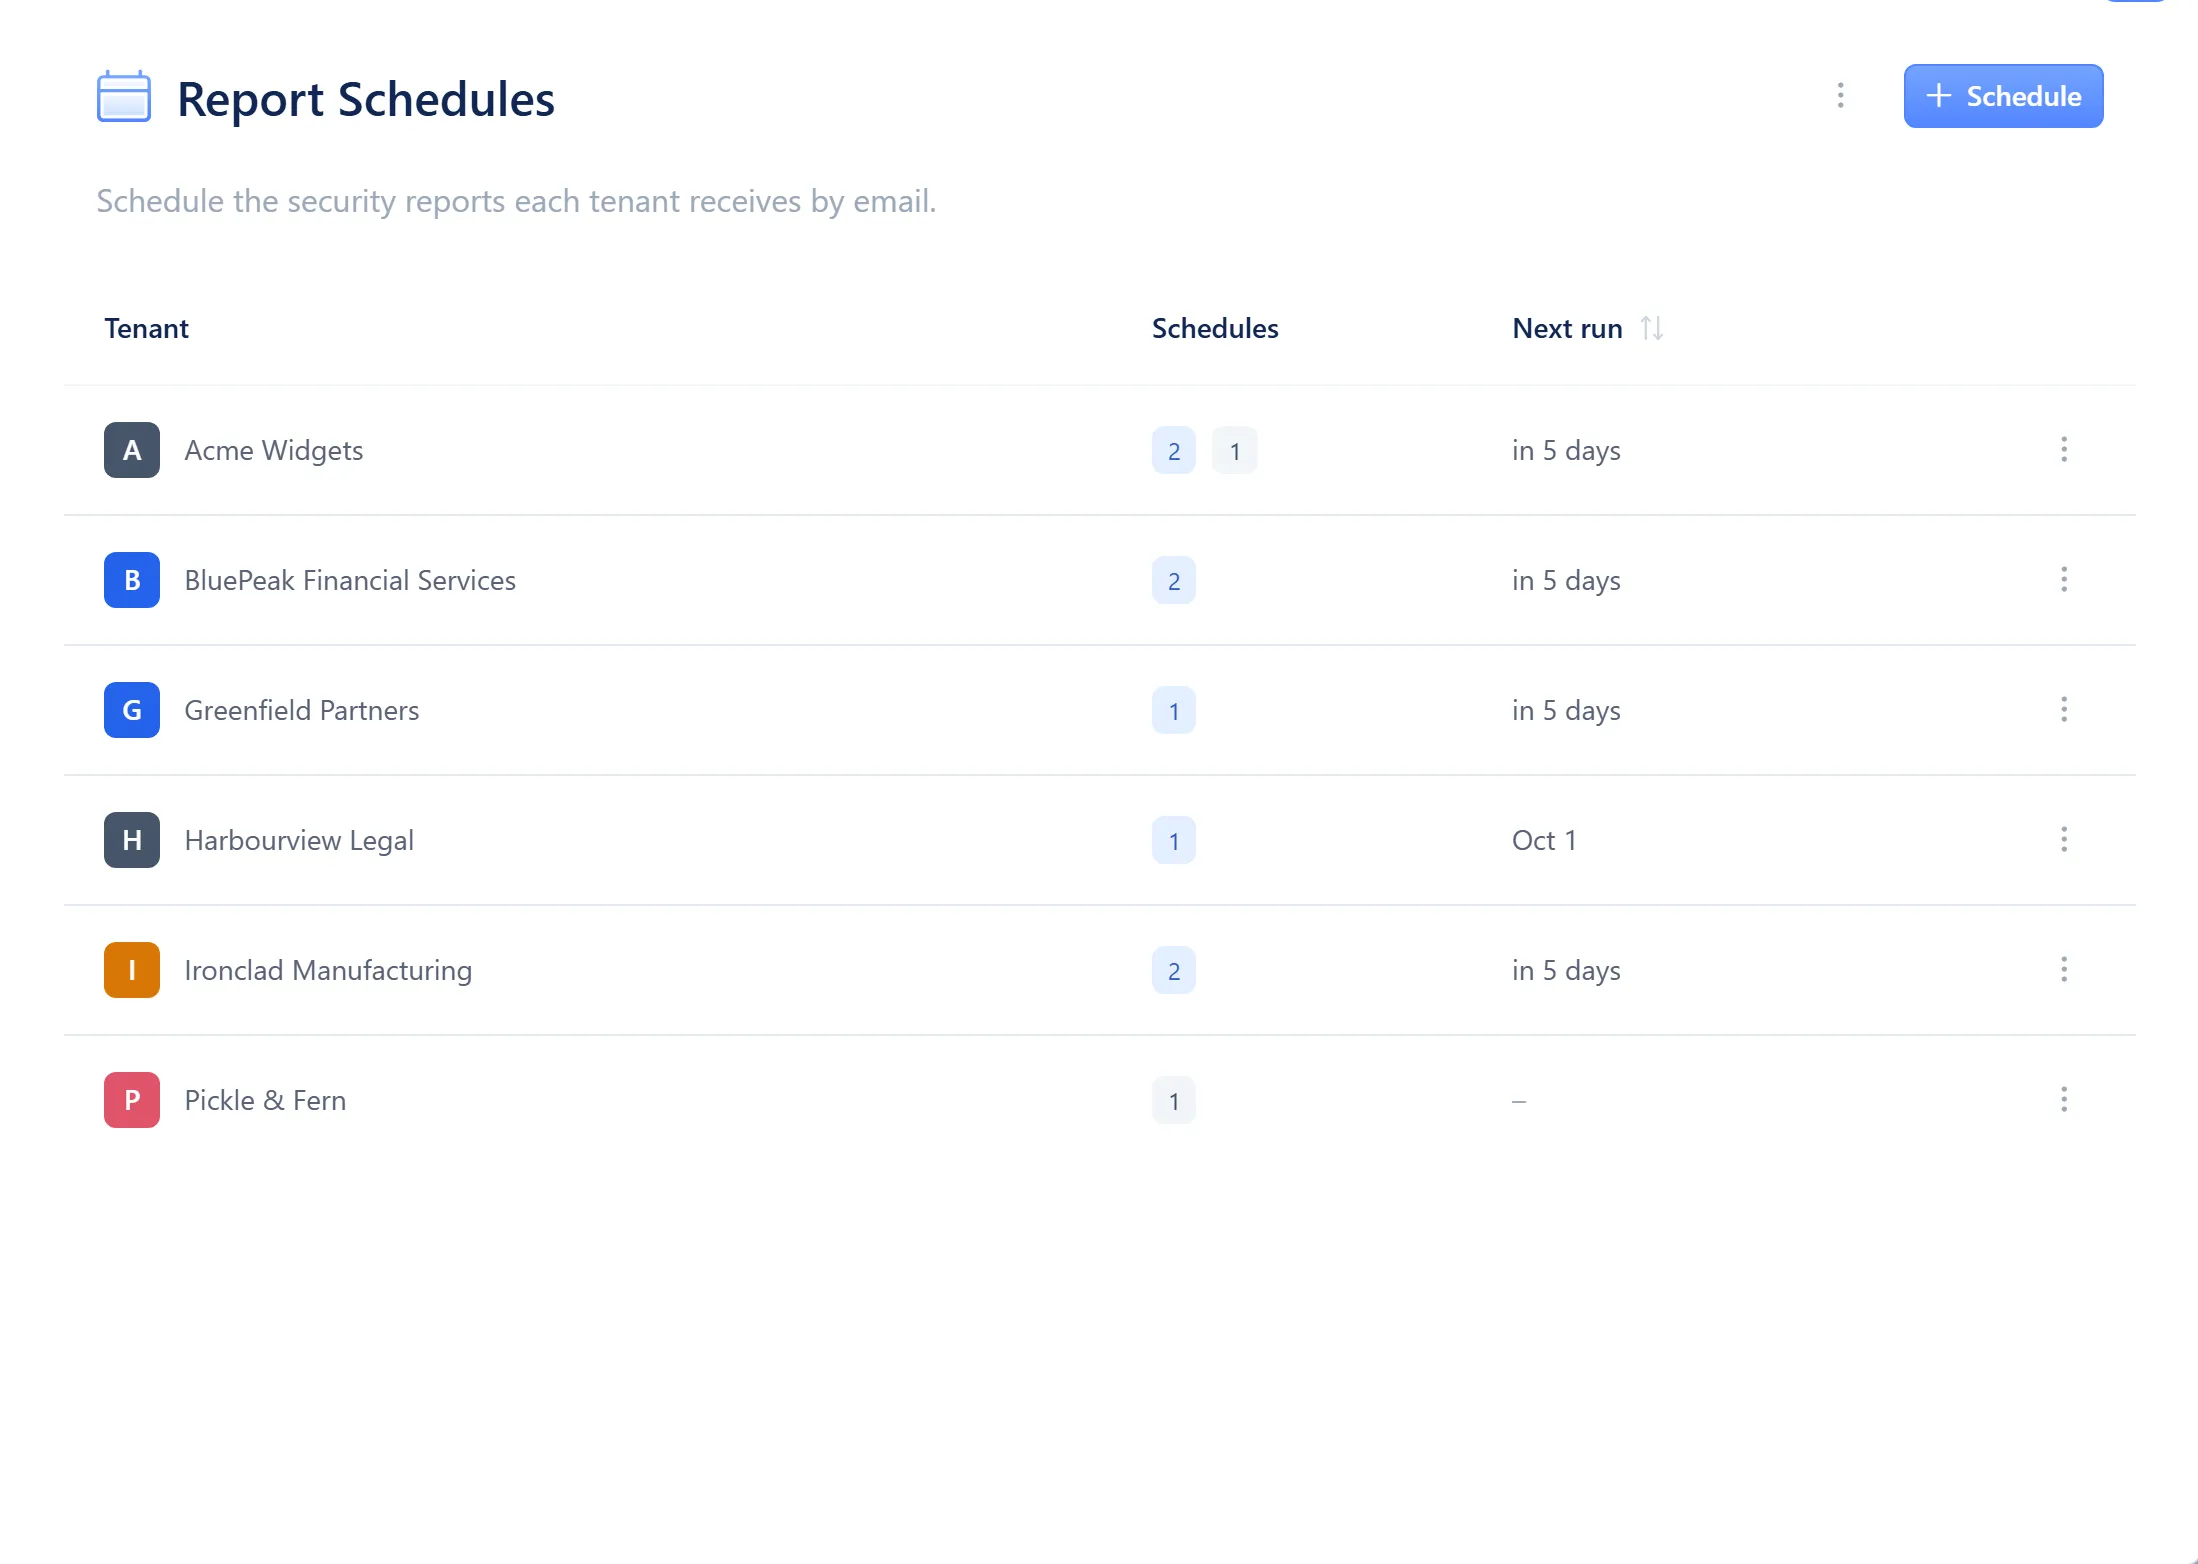
- Select + Schedule to create a schedule without choosing a tenant first
- A tenant’s row — enabled and paused counts, and the soonest next run
A tenant’s schedules
Section titled “A tenant’s schedules”Selecting a tenant opens its schedule list: name, frequency, send time, next run, and an Enabled toggle you can switch directly from the row.
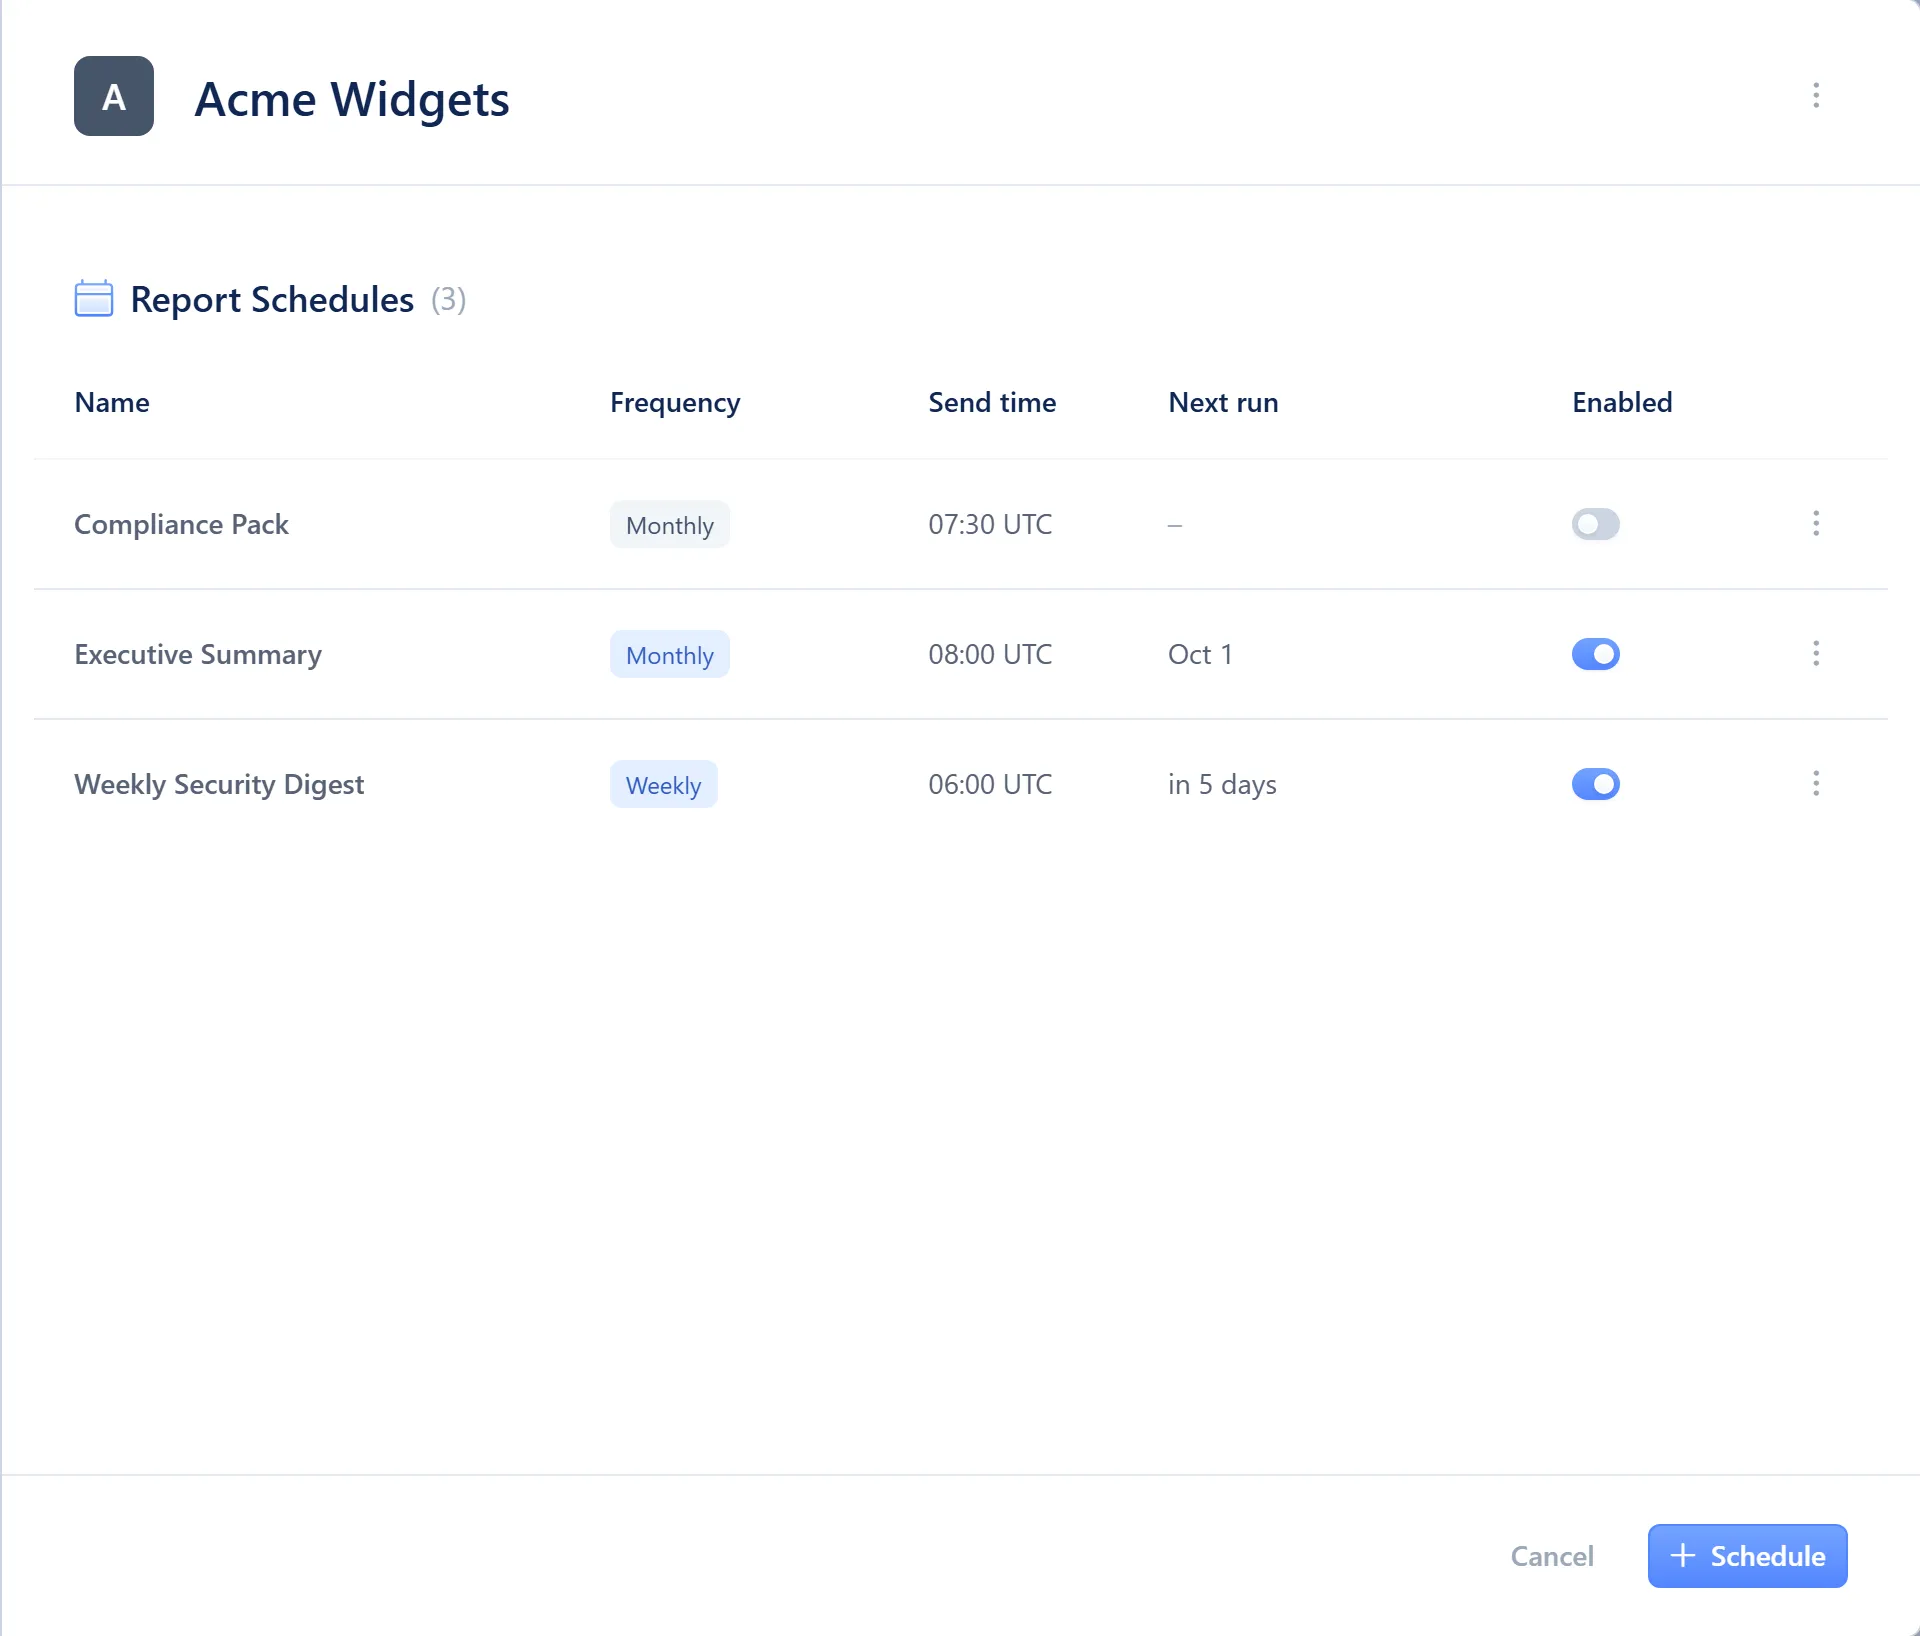
- The Enabled toggle — switch a schedule off without opening it
The schedule editor
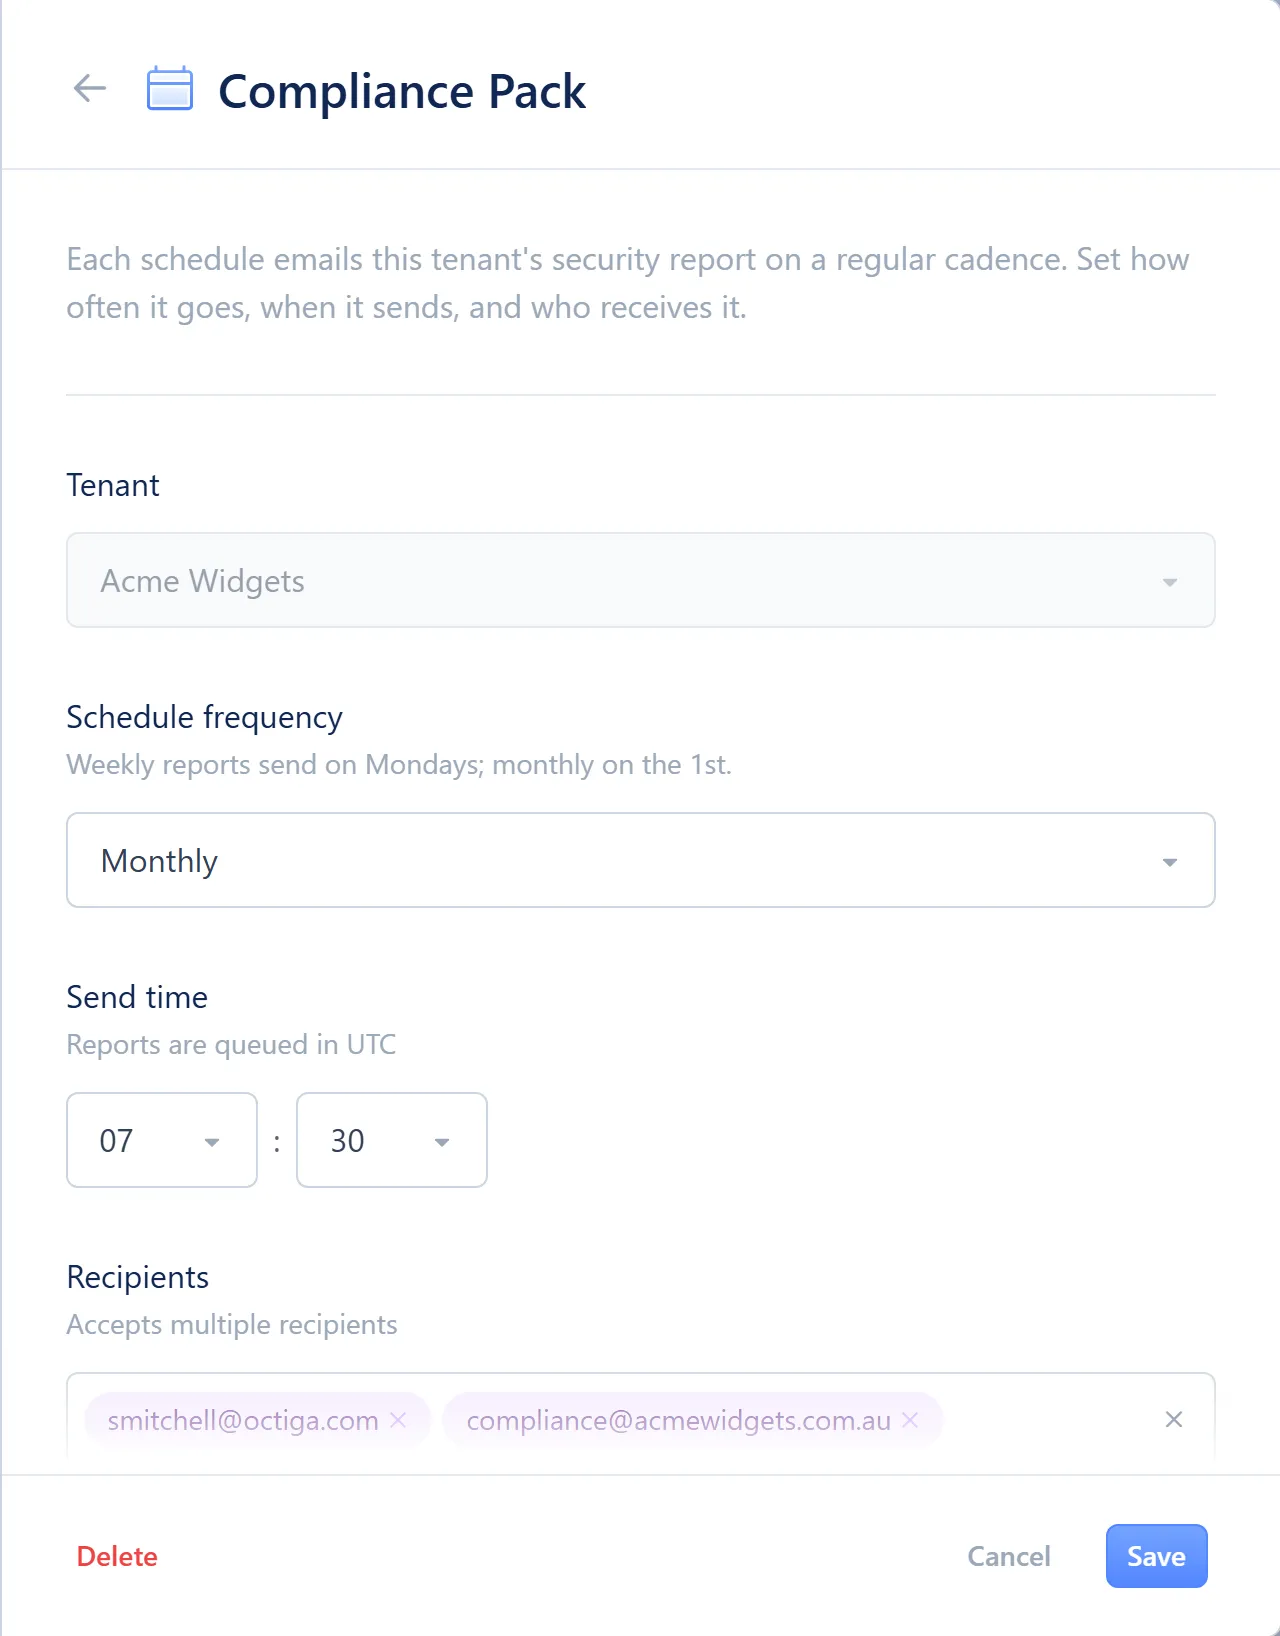
Section titled “The schedule editor”Selecting a schedule opens its editor.
| Field | What it does |
|---|---|
| Name | Set once when the schedule is created; auto-named until you edit it, then edit-in-place in the header |
| Tenant | The tenant the report is for; locked once the schedule exists |
| Frequency | Weekly (Mondays) or monthly (the 1st) |
| Send time | The hour and minute the report is queued, in UTC |
| Recipients | One or more email addresses; distribution lists and shared mailboxes are accepted |
| Schedule status | Enabled or Disabled |
Create a schedule
Section titled “Create a schedule”-
Open Settings from the gear icon, then choose Report Schedules.
-
Select the tenant, or select + Schedule at the top of the list to start without choosing one yet.
-
Choose Weekly or Monthly.
-
Set the send time. Times are always in UTC.
-
Add one or more recipient email addresses.
-
Leave Schedule status as Enabled, then select Save.
Pause a schedule
Section titled “Pause a schedule”-
Open Settings from the gear icon, then choose Report Schedules.
-
Select the tenant.
-
Turn off the Enabled toggle on the schedule’s row.
Pausing keeps the schedule; it stops sending until you turn it back on.
Change recipients
Section titled “Change recipients”-
Open Settings from the gear icon, then choose Report Schedules.
-
Select the tenant, then select the schedule.
-
Update Recipients.
-
Select Save.
Related
Section titled “Related”For who can reach this section, see Roles and permissions. For the access groups that grant it, see Access controls.